

Build your own Wall
How?
The English climbing magazines are full of training articles and regimes to improve climbing ability. Many of these articles centre around training on home made Walls but there has been very little information published on actually constructing your own wall.
I have now had a hand in building three walls, my own, Warren’s and Big Mick’s and have gained knowledge that might help if you are considering building your own wall.
I built my wall last winter with the help of Warren and have really enjoyed using it. Attics, garages and cellars are ideal places to build your wall and the cost can be very low…… mine cost less than £10 most of the bits being scrounged here and there and probably took about 10-15 man hours to build.
The basic structure is 18mm (3/4″) plywood which came mainly from old packing cases. The plywood was attached to a framework of 75mm x 50mm (3″x2″) rough sawn timber by woodscrews at the desired angle to the wall by suitable wall fixings (Fischer type).
Before erection the plywood was drilled with a matrix of 10mm (3/8″) holes to facilitate 8mm T nuts for hold attachment. It was first intended to use resin holds (like those used in most commercial walls/gyms) with just a few wooden holds mainly for feet. Resin holds are very expensive and to start with holds were made from offcuts of hard and soft wood. The holds were manufactured extremely quickly with an electric “jigsaw” and “powerfile”. Holds of all shapes and sizes were made and most were screwed directly to the plywood with countersink woodscrews using a powered screwdriver.
My wall
My wall comprises three areas firstly a 30 degree overhang 2.8m (10′) leading to a fully overhanging section for 1.25m (5′) and down the other wall of the garage at about 15 degrees overhanging in the form of an arch. This is steep enough for me and reasonably space efficient ( I can still get the car in!). The redundant space at the rear of the wall is shelved and used for storage. If the angle is too easy use smaller holds!
Tips from experience
Warm up by doing stretching and a few easy circuits, if your wall is in a cold place get a small heater to remove the chill.
Don’t waste your time on resin holds, wood is cheap and readily available. Wood is warm and appears more tendon friendly and does not seem to get greasy like resin.
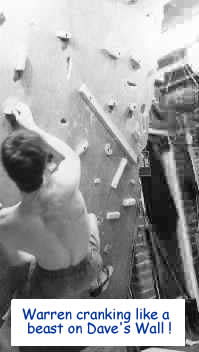
Train with a friend. It helps to push you on for a few extra moves and gives more insight into technique watching each others mistakes/sucess.
Monitor circuits and numbers of moves made and also monitor rest duration and try to gradually reduce this to see improvement.
Performance Monitoring
I am no training freak but have seen an improvement from using the wall. Most of the activity is centered around circuits of differing styles of 20 to 100 moves in duration. There are several circuits some very fingery some very army with mixtures of crimps, cranking, undercuts, pinches, matches, etc, etc. The number of moves are recorded and performance can be monitored which provides encouragement if the number goes up. The graph shows increases in performance on a number of circuits this is not that scientific because it does not take into account familiarity with the moves or rate but it does show increases and is encouraging.
Large Hold Manufacture
If you have a very steep wall or are not ready for small holds then you will require large holds (jugs) these may appear at first to be very difficult to make and you may be tempted to buy resins but they can be made quickly and cheaply our of wood. The diagram shows how.
Make sure all edges are rounded off to prevent injury and the wood splitting. I would advise that T bolts are considered for attaching these holds because indoor jug pulling becomes boring and the holds can be moved around more easily.